}

Pages

Showing posts with label dye. Show all posts

Saturday, February 15, 2014

Komasu shibori


This was a desperate attempt to breathe a last life into my unloved wrap with the screenprint birds on it. 
I had fabrics-store's bluebonnet colored linen.  It was used for a long time as a size 6, but that size was not really working for me anymore.  I didn't realize it was the size, but thought it was just too boring.   In an effort to make the wrap more exciting, I screenprinted scissor-tailed flycatchers on it.

original birds

But they didn't really show up much when wrapping, unless I made a point of it.  I was thinking about what to do come winter and so I ended up chopping the 6 into a 2 + a piece for a warm wide-bodied pod.  Now I had 2 bird wraps and my collection was heavily skewed towards blue wraps.  The birds started cracking and peeling off, so I went ahead and stripped the wrap with two packets of Rit color remover.

stripped with one bird remaining

The screenprint did not strip off as I had hoped, but the wrap itself came out to an ugly old dishtowel color, which was nice in that it was light and totally workable for an overdye.  I left it to sit in hot water with soda ash and dawn and once it had sat until it was cooler, scrubbing at the birds with an old dishwashing brush.  Eventually the birds but one (which hadn't peeled so I thought I might leave it) looked mostly removed so I threw the wrap in for a hot scour in the washing machine and was pleasantly surprised by how the unevenness in color leftover from the strip seemed to have leveled and also how the birds were even more invisible than I expected.  I decided to go back a step and remove the last bird and rescour.  Next I dyed the wrap using a mixture of fuchsia and royal blue.


'light' purple first dip

It came out darker than I was intending, since this was just supposed to be a base layer to cover the dishtowel color.  OH well it's pretty.  Time to tie up the shibori.  I used the komasu "small squares" technique after ironing into accordion folds.  I cut two triangles from cardstock to use as templates.  One triangle was half the size of the other.  The spacing in between the big stitched triangles was one leg of the little triangle and the spacing in between the little stitched triangles was one leg of the big triangle.  I laid the templates out onto the wrap and just marked with a pencil.   To make your stitched guides, you make a long, evenly spaced running stitch in a right equilateral triangle with the hypotenuse running along the fold of the fabric.  You want to have a knot at one end of the stitching and the other end loose.   Then once all the guides are stitched in, you can start cinching up the stitching to create little pleated tufts.  Bind the tufts by wrapping tightly with thread at 2 points to get the double layered squares.  I like using kamosage knots because they are easy to undo later and quick to make in the first place.  Additionally, they have a surprisingly helpful grip if, afterwards, you reverse your binding direction at the next tuft.    The book I learned the technique from is called Shibori: The Inventive Art of Japanese Shaped Resist Dyeing.


pleated and stitched

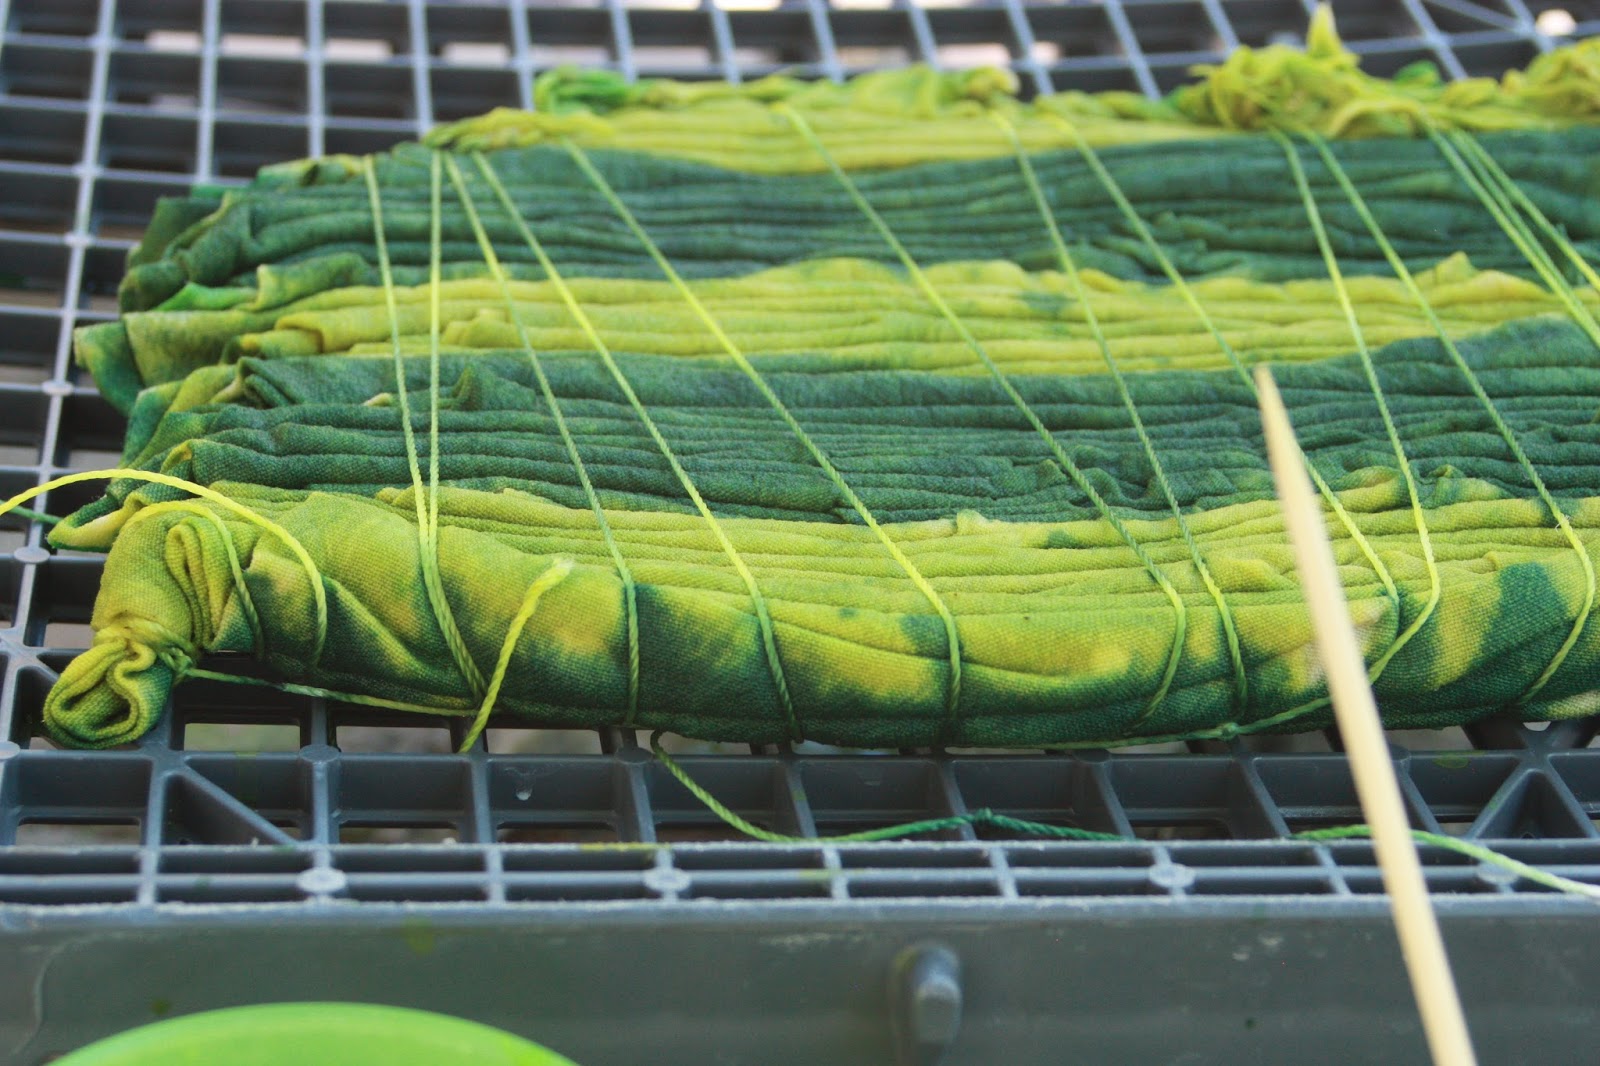
stitching cinched and bound

on both ridges and valleys of pleats


I cut off one of the old hems from which the birds hadn't flown to test color during the second dip. 
I put the grey dye in the bath, but it wasn't enough grey, so I ended up adding some old royal blue I had mixed up (of unknown strength).  That was too pink still, so I added even more royal blue.  Then it got too blue, so I added fuchsia.  When I got it to my satisfaction, I added the soda ash.    After a while of swishing to make sure the dye uptook evenly, I moved on to rinse stage--letting it soak for about an hour.  Then I undid the binding with the seam-ripper (carefully) then a final rinse, then hot wash.  The rinse from the hot wash actually came out really clear the first time, which rather surprised me. 


total hands-on time: 18+ hours
screenprint:  3hours
chop &rehem: .5 hours
strip: 1 hour
scrub birds off: 3 hours
dye purple: 2 hours
tie in shibori: 6 hours
dye deep purple: 2 hours
untie: .5 hr
That doesn't even include all the time it was being hand rinsed, washed, scoured, or my hands being cleaned up.

I am really enjoying this wrap so far.   I think it was well worth all the time I've spent on it in all its various stages.  And as usual, I learned a TON of lessons and techniques. 

Tuesday, November 26, 2013

Elephant Skin Overalls


This has been the destiny of a remnant of grey cord ever since I bought it a while back.  I don't think any other fabric I have gotten has had so dedicated a purpose, or been used so completely by a project.  They fit well over a diaper but also work with undies, depending on how things are going.  The leg openings are loose so they don't constrict movement or sitting.  They are long enough to be rolled down a bit, but are turned up into bright blue LWI dyed cuffs for the time being.  The shoulder straps can be uncrossed, since they are held in place by a loop of ribbon.  The elastic at the back helps hold shirts down, and is less fiddly to dress than side buttons.  The only thing I should have added (and I always forget!) is pockets.  It might be too late for this project. 


Saturday, August 10, 2013

Clarifying Folding Technique of Green Diamonds Wrap

In photos. 

The main folds are along the red dashed lines and the black lines are secondary folds created after the initial folds.  However, the whole thing was worked left to right so only a couple of the sections were being worked on at any one time.  The dashed lines represent mountain folds and the dotted represent valley folds (as in origami). 


folding diagram

first set of primary folds

filling in some secondary folds

pinching up some secondary folds
setting up next segment of primary folds

pinching up more secondaries

it stayed better with wet fabric than this dry run

working along to create the concentric secondary folds in a V shape

another segment done

from more directly above, more scrunched up
ridges marked out

Friday, August 9, 2013

This Got Lost in the Shuffle

Back in June, I dyed this wrap and then forgot to document it.  Green was the only thing that I was really set on beforehand, and so this was an awesome excuse to mix up a bunch of greens to play around with.  I like to mix colors in egg cartons (we buy Costco quantities) for small swatches.  I ended up mixing 4 different colors of green, but the effect of the tied resist was more than I was expecting, so they didn't show up the way I envisioned.  Which is probably for the best.  

First I washed in PTD on hot, then soaked in soda ash, while I mixed up the colors.  I ended up letting it soak overnight because things came up. 

Next morning, I took out the wrap and since it is so dry here and I wasn't sure how long it would take to fold, I didn't actually wring it out.  I probably should have, but didn't realise it would be ok even if it did dry out at this stage.  

I folded it lengthwise, trying to make it as evenly done as possible, which was hard because it was windy, and I pretty much always work outside.  I folded it in half the other way, too, so that all the fringe was at the one end.  I then arranged it so it would unfold from a neat little pile as I worked on my tie-dye fold from the opposite end. 

whew.  one (lengthwise) fold done, about a million to go.

To fold it, I basically made zigzags that went from edge to edge and then filled in the spaces with more concentric folds.  I practiced first on paper and used markers to show how the dye would go to make sure what I imagined would happen would actually happen.  My mind is spatial enough that usually it works out, but "measure twice, cut once", ya know?

folded

Once I folded it all up, which took something like an hour straight, I trussed that sucker up like a Thanksgiving turkey.  I didn't want it misbehaving while I was trying to dye.  But this step was sorta tough, maybe it would be better to have the strings laying out beforehand, or maybe that way it would have been hard to fold, I dunno.  Tying up around the fringe was something I should have thought of beforehand.


trussed

Next it was time for the fun part!  Application of the dye.  I wanted each diamond to contrast with the next diamond over, so I tried to plan the colors accordingly, only they got mixed up in the move from the porch mixing station to the shady tree dyeing station.  I think I should have used the baster, but I couldn't find it, and I think it was last used for fertilizer and I dunno whether that would be compatible with dye.  So I used the third or 4th best thing, baby Advil syringes.  These things are soooo small, but I thought it would be better for control than nothing.   The dye pattern I used was supposed to make light and darker versions of the dye form the stripes.  That part worked out fine, but maybe sticking with 2 colors rather than 4 would have been better.  You can see in one of these photos how on the top side of the fabric turkey I used light green and on the bottom, dark green.  So then for the next diamond over, I used dark on the top and light on the bottom, and alternated in that manner all down the wrap.  I should have been more careful with the drips and drops, but my time was running out.

left-handed at arm's reach mad dyeing skills
top and bottom color difference visible on front edge

Then you just let it sit for 24 hours.  Except I didn't have the patience--I think it sat until evening.  It was really hot (and dry), though, so I don't usually see a difference in vibrancy by waiting.  Here's my super-duper-high-tech system.  I just wanted any excess dye to really drain away, but at the same time wanted to keep it covered to keep from drying out too fast.

waiting

Here it is in the rinsing out stage.  This is where I felt like I should have used more dye, and massaged it in deeper, only I didn't because I didn't want it to turn to mush.  You can see the middle here, where I did the widthwise fold, and how that made one diamond out of two halves of folded diamonds.  The fold really affected how well the dye penetrated, so you can see a distinct line through the diamond which isn't as obvious with the others since they are more separated.  You can also see where I did the different pairs of greens.  I like the really light and really dark pair best. 


rinsing

And after it was fully washed and dried and a couple days of staring at it, I was a lot happier with it.  The places that rinsing made blatantly obvious were more muted.  The white balance was particularly hard to adjust on these photos, since the fabric was a natural color, not pure white, and it's no longer in my hands to compare. 
done!


Monday, August 5, 2013

Stripes Tie-Dyed Wrap

I bought a length of Osnaburg a little bit back mostly because I wanted to see if it was all it was hyped up to be as a wrap.  It was a little darker in its natural color than I had imagined, so the ideas I had rattling around in my head were laid aside for now.  I wanted to use the natural color as almost part of the design, or at least to shift the colors into a range that was not so glaringly bright.  So I decided on stripes.  Originally I thought about green, blue and orange, but on doing some test stripes, I actually wanted more warm colors than cool ones.

I folded the fabric accordion-style across the length of the wrap so that when I applied color it would create stripes that ran along the rails of the wrap.  Once I had gotten some more or less regular folds, I started tying.  I was intending to use twine, but when it came right down to it, rubberbands seemed easier, especially since I had done a soda ash presoak and was folding wet, so I had gloves on anyway.

folded
rubberbanded
Then I mixed up the dyes: burgundy, deep orange, chinese red, and a purple and a blue of my own composition.  The next step was incredibly time-consuming.  I applied the dye to the stripes between the rubberbands using a syringe.   I stuck the syringe into the folds to inject the dye into the tight spaces.   Once the dyes were applied to the top half of the folded wrap, I massaged in the dyes. Then turned it over and did that whole process again on the other side.  With a now screaming toddler.  Fun.  I turned on the hose for him, even though it's a little "chilly" today.  It took about an hour and a half to do all the folding and dyeing.  After covering in plastic and setting in the sun there's a bit of a break.

dye added
About 3 hours after I left it, I came back to add more dye into folds and do more massaging.   Things were looking pretty good and I had high hopes.

I ended up taking it all inside after the sun went behind the mountains, and I'm glad I did because we got the first rain in months overnight.   I put it in the garage since it's warm and babyproof.  Then in the morning, I moved on top of the dryer while I did laundry for some more warmth.  If I'd done this last week the temps would have been vastly different!  At 24 hours along, I decided it was as thoroughly done as it was gonna be, and it's not getting any warmer.  I also was starting to worry about the dyes creeping into each others' territory and turning too muddy.  So into the washer to rinse it went!  I considered setting it out in the rain, but decided that without constant checking it might bleed all over itself.  A few hot washes later and it looked like this:

warm stripes


Sunday, July 14, 2013

Onbuhimo

Onbuhimo is a style of baby carrier that seems to have its roots in Japanese traditional babywearing.  It's alot like the more commonly used Mei Tai but instead of having a waistband strap it has 2 rings or loops of fabric, which you thread the shoulder straps through.  I've been off the Ergo lately because I want to have F riding up high on my shoulders as it causes fewer back problems that way, and he can see better.  This carrier has the added advantage of not having a waistband, which I find nice.  
I knocked out this version in just a few hours (after loads of research), and it really came out much better than I expected.  I used a couple of old pillowcases for the decorative panels and there is a hidden inner layer of duck canvas to which the straps and rings are attached.  The curve part at the top seemed like a better idea than it felt like while I was sewing, but it could have been worse.  There are definitely things I'd improve, mostly in my construction techniques to streamline the process, but I'm satisfied with its safety, functionality, and looks...at least from a distance.   The straps were grad dyed linen, but only a couple of inches wide.  Apparently wider is better.  The rings are size medium, too big and too far from the panel corners, thus creeping up my sides awkwardly.  The body panel itself was actually pretty good.  

...

Well... I have since taken apart the onbu, since the straps were too thin and diggy, the body panel was not very knee-to-knee, and I needed the too-big-for-this-project rings to put to better babywearing use.  Plus I found directions for how to tie mei tai waist straps into loops to use the MT as an onbu, so I figured I should just make a mei tai.  So I did.  See the previous post.  

Here's a shot of it during the onbu's maiden voyage:
onbu

Saturday, July 13, 2013

Itajime

A clamped resist experiment.

Sorry folks, I've given up on wasting my time formatting these entries.  Apparently the only way to achieve concinnity (I hope that's a real word and M-W isn't hoodwinking me, the red squiggle's hanging around) throughout posts is just to leave things in default, which unfortunately means Times New Roman--gag.  Well if you want pretty, skip to the pictures like everyone else.


In this project I wanted to end up with some cool hexagonal--or at the very least triangular-- repeat pattern over the whole of the fabric.   So I folded it in half lengthwise, then in half again lengthwise, then a la paper football, only instead of a right isosceles triangle I did equilateral triangles.  Then I smooshed the fabric all down between 2 vitamin water caps and clamped them with this crazy easy grip clamp thing I found in the garage.  Only apparently I could have smooshed it more if I'd used it the right way.  It didn't make much difference anyway.  I then dipped the fabric in some leftover green dye from a tie dye project a couple weeks ago, added soda ash, and left it for a while.  An hour?  I dunno.  When I rinsed it out, it turned out that the dye had really only highlighted the edges of the folds, and due to my thoughtless folding, the folds that were more in the center hardly got any dye.  The circles I was hoping would appear were nowhere to be seen.    End of round 1.

Round 2:  I basically folded it exactly the same except I tried to be conscious of which direction of folding would allow more raw folded edges to be accessible to the dye.  I had figured out how to get the clamp tighter and thought that was going to help.  I soaked in soda ash then dipped in a concentrated mixture of royal blue for another couple of hours.  I still wasn't satisfied--I wanted circles, by golly!  So before my dye exhausted I folded it up one more time for another round.

Round 3:  I folded this time just into squares because I was hungry and dinnertime and whining toddlers are hardly conducive to repeating the same time-consuming fold for the third time.  This time I let it just sit overnight, and when I rinsed in the morning, voila! there were my circles.  Of course that wasn't really the effect I was going for, but still totally cool. 


Round 1: clamped fabric football

Round 1: green dye soak

Round 1: results

Round 2: results
Round 3: square fold clamped

Final product


Friday, July 12, 2013

Ice Dye Experiments

In this facebook group I'm in we have seen a lot of ice dyeing since it's fun, easy, beginner friendly and ideal for summertime.  People have been wondering what effects temperature and therefore melt speed has on the pattern that emerges.  I had ice dyed in the summer last year and the pattern came out very much like watercolor and I also did some in the winter which came out crisper, which led me to believe that cooler melt temps would give colder looking patterns.  Boy was I wrong!  I also wanted to find out if ice size had any effect, so I crushed up some ice in our mortar/pestle.

I presoaked for an hour or so in soda ash solution, squeezed out excess water.  Crumpled onto draining trays set in drip-catching trays.  Covered in both regular and crushed ice.  Sprinkled dry dye powder on top, and set in their respective temperatures.  The one I set outside was inside a clear plastic box with lid in direct sunlight when the shade temps were around 100 F.  It melted almost completely in an hour.  The fridge temperature was apparently too cool for the ice to melt at a decent rate, and so after 4 hours, I brought it out into the house temperature, so maybe 80-85 or thereabouts, and it melted by 2 hours later.   A rinse and a soapy hot wash and hang to dry.


to melt outside
to melt in fridge


iced
iced


t=0
dyed, t=0


t=1 hour


t= 4 hours
t= 4 hours


rinse
L->R: itajime; fridge; outside; outside

The itajime is from another project and another post.  Maybe later.  Maybe if blogger's formatting didn't suck so much I would have had it done today too.