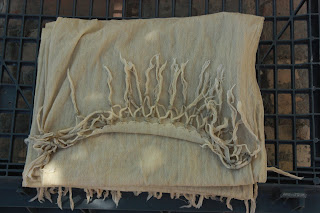
First I washed in PTD on hot, then soaked in soda ash, while I mixed up the colors. I ended up letting it soak overnight because things came up.
Next morning, I took out the wrap and since it is so dry here and I wasn't sure how long it would take to fold, I didn't actually wring it out. I probably should have, but didn't realise it would be ok even if it did dry out at this stage.
I folded it lengthwise, trying to make it as evenly done as possible, which was hard because it was windy, and I pretty much always work outside. I folded it in half the other way, too, so that all the fringe was at the one end. I then arranged it so it would unfold from a neat little pile as I worked on my tie-dye fold from the opposite end.
 | |
| whew. one (lengthwise) fold done, about a million to go. |
To fold it, I basically made zigzags that went from edge to edge and then filled in the spaces with more concentric folds. I practiced first on paper and used markers to show how the dye would go to make sure what I imagined would happen would actually happen. My mind is spatial enough that usually it works out, but "measure twice, cut once", ya know?
 |
| folded |
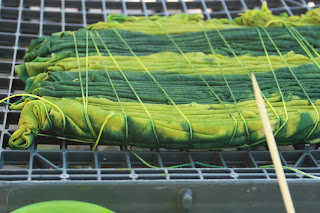
Once I folded it all up, which took something like an hour straight, I trussed that sucker up like a Thanksgiving turkey. I didn't want it misbehaving while I was trying to dye. But this step was sorta tough, maybe it would be better to have the strings laying out beforehand, or maybe that way it would have been hard to fold, I dunno. Tying up around the fringe was something I should have thought of beforehand.
 |
| trussed |
Next it was time for the fun part! Application of the dye. I wanted each diamond to contrast with the next diamond over, so I tried to plan the colors accordingly, only they got mixed up in the move from the porch mixing station to the shady tree dyeing station. I think I should have used the baster, but I couldn't find it, and I think it was last used for fertilizer and I dunno whether that would be compatible with dye. So I used the third or 4th best thing, baby Advil syringes. These things are soooo small, but I thought it would be better for control than nothing. The dye pattern I used was supposed to make light and darker versions of the dye form the stripes. That part worked out fine, but maybe sticking with 2 colors rather than 4 would have been better. You can see in one of these photos how on the top side of the fabric turkey I used light green and on the bottom, dark green. So then for the next diamond over, I used dark on the top and light on the bottom, and alternated in that manner all down the wrap. I should have been more careful with the drips and drops, but my time was running out.
 |
| left-handed at arm's reach mad dyeing skills |
 |
| top and bottom color difference visible on front edge |
Then you just let it sit for 24 hours. Except I didn't have the patience--I think it sat until evening. It was really hot (and dry), though, so I don't usually see a difference in vibrancy by waiting. Here's my super-duper-high-tech system. I just wanted any excess dye to really drain away, but at the same time wanted to keep it covered to keep from drying out too fast.
 |
| waiting |
Here it is in the rinsing out stage. This is where I felt like I should have used more dye, and massaged it in deeper, only I didn't because I didn't want it to turn to mush. You can see the middle here, where I did the widthwise fold, and how that made one diamond out of two halves of folded diamonds. The fold really affected how well the dye penetrated, so you can see a distinct line through the diamond which isn't as obvious with the others since they are more separated. You can also see where I did the different pairs of greens. I like the really light and really dark pair best.
 |
| rinsing |
And after it was fully washed and dried and a couple days of staring at it, I was a lot happier with it. The places that rinsing made blatantly obvious were more muted. The white balance was particularly hard to adjust on these photos, since the fabric was a natural color, not pure white, and it's no longer in my hands to compare.
 |
| done! |

No comments:
Post a Comment