}

Pages

Sunday, July 14, 2013

Onbuhimo

Onbuhimo is a style of baby carrier that seems to have its roots in Japanese traditional babywearing.  It's alot like the more commonly used Mei Tai but instead of having a waistband strap it has 2 rings or loops of fabric, which you thread the shoulder straps through.  I've been off the Ergo lately because I want to have F riding up high on my shoulders as it causes fewer back problems that way, and he can see better.  This carrier has the added advantage of not having a waistband, which I find nice.  
I knocked out this version in just a few hours (after loads of research), and it really came out much better than I expected.  I used a couple of old pillowcases for the decorative panels and there is a hidden inner layer of duck canvas to which the straps and rings are attached.  The curve part at the top seemed like a better idea than it felt like while I was sewing, but it could have been worse.  There are definitely things I'd improve, mostly in my construction techniques to streamline the process, but I'm satisfied with its safety, functionality, and looks...at least from a distance.   The straps were grad dyed linen, but only a couple of inches wide.  Apparently wider is better.  The rings are size medium, too big and too far from the panel corners, thus creeping up my sides awkwardly.  The body panel itself was actually pretty good.  

...

Well... I have since taken apart the onbu, since the straps were too thin and diggy, the body panel was not very knee-to-knee, and I needed the too-big-for-this-project rings to put to better babywearing use.  Plus I found directions for how to tie mei tai waist straps into loops to use the MT as an onbu, so I figured I should just make a mei tai.  So I did.  See the previous post.  

Here's a shot of it during the onbu's maiden voyage:
onbu

Mei Tai


Before I get started, I feel I should put in a disclaimer.  First, please only use this for personal use.  I deliberately did not include a scaled photo or pattern so that you have to figure out your own pattern/measurements.  That way it will fit you and your baby perfectly.  Secondly, if you use this recap to make a baby carrier, use common sense.  You are responsible for the safety of your child and you are the best gauge of your sewing skills.  Make sure you are using the right materials, techniques, etc to reduce risks.  Overengineer where your baby's safety is concerned.  Test along the way!  Once you sew on the straps, give them as hard a pull as you can.  You want to find out now if they will hold weight, not once you're carrying a baby.  If there's something you are in doubt about, search  for answers/ask me before moving on!  Jan Andrea's site is incredibly valuable: http://www.sleepingbaby.net/jan/Baby/index.html  

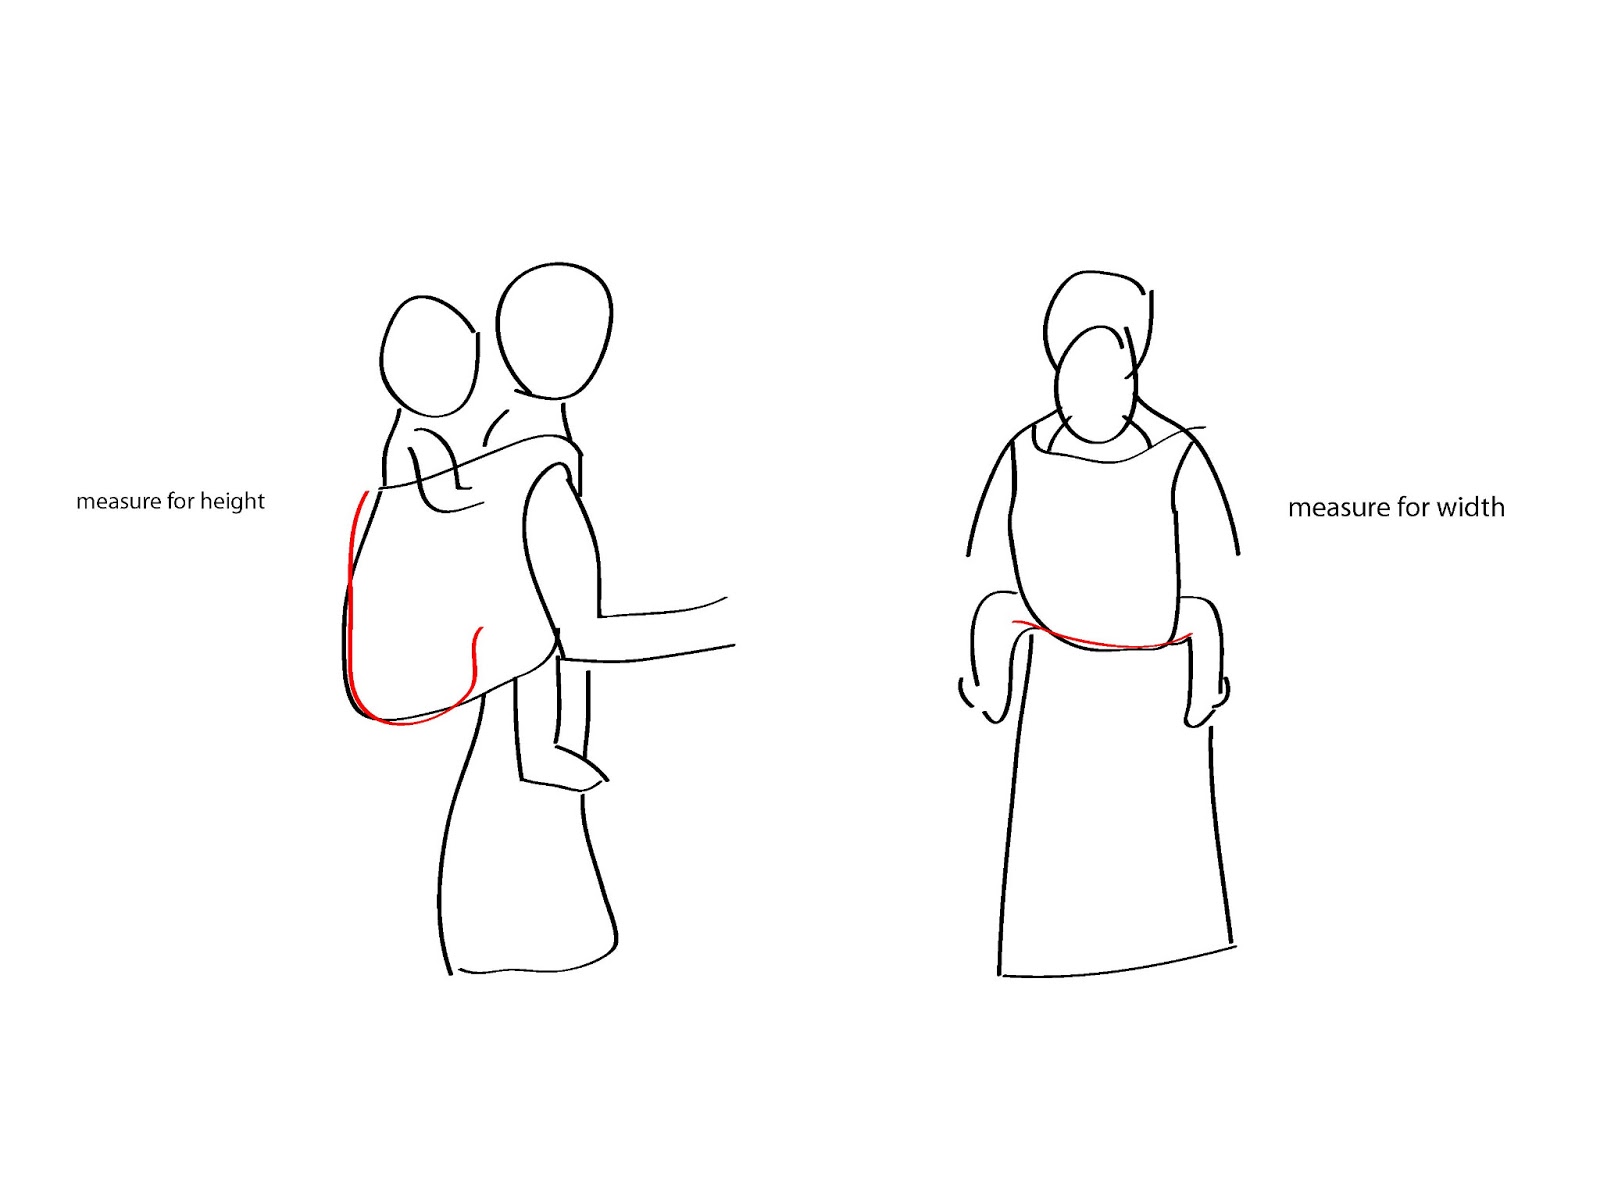
For this mei tai I used the onbuhimo I made a few months ago as a basic pattern, modifying it where I felt necessary.  If you don't have a carrier whose body shape/size you like, you'll want to wrap your baby on your back or front, making sure you get a good seat.  Using a soft tape measure, measure between the knees curving along the baby's bottom at the lowest point.  Also measure from the bottom rail (or where your seat is really tucked under, between the baby and you) to the height you'd like the carrier to go up to.  (I'm planning on adding the waist straps at an angle, so the carrier will be tied "apron style" which means you tie the waist with the carrier hanging down like you would an apron, and then when you bring it up over baby's back it creates a nice unpoppable seat by definition.  The other waist tie style is like that used for the Ergo.  Anyway, it's something to take into account when measuring.)  I can tell from my explanation that some diagrams would be nice here.  To give you a rough idea: I have a really tall, long-torsoed toddler and my numbers were knee-to-knee: 19" and height 21".  And you can always add a bit extra for seam allowance.  The advantage to doing the canvas inner layer for me was, in part that I don't mind cutting that up and having to chuck it and start over if it was totally wrong.  So for your pattern use something cheap like newspaper or muslin if this step daunts you.  But then make the actual inner layer out of something sturdy.  I strongly recommend using an inner layer of canvas (aka duck cloth), even if your two outer layers of fabric are strong, and it is absolutely requisite if your outer decorative fabrics are not too sturdy.  While I would use a single layer of medium weight linen fabric to wrap a baby in a rucksack carry, that is a fabric with no stitching compromising its strength.  So here I have used 2 layers of medium weight linen plus a canvas inner layer.  And of course you want your straps to be of good quality sturdy fabric, too.
how to measure: click for larger image


After obtaining my measurements, I laid the onbu out on the canvas layer, and this time I decided not to add a seam allowance for this layer, since it adds unnecessary bulk when sewing and then topstitching.  I traced out my new idea, only halfway around, and folded the fabric along the center line (vertically) to cut through both layers more symmetrically.  I then wrapped the baby again and held up the canvas to make sure the size was more or less correct.  I then traced the pattern onto the pretty fabrics, adding in a generous seam allowance.  Next I cut strips of linen to become straps.  The dimensions are all up to your preference and body type.  I wanted mine wide to distribute weight better and long to allow more tying options, you can always cut down later.

onbu laid out on canvas fabric

canvas folded in half and cut
Next I hemmed then pleated the strap fabric to fit into the width of the strap spaces on the canvas.  I pinned them within an inch of their lives using those nice long quilters' pins.  Tacked them down.  Here's where safety again rears its complicated head.  You have to use either X box tack method or bar tacking.  I started out by using X boxes because that's what I'm more familiar with, but noticed when I pulled the straps that they were coming unpleated and looked stressed.  So I threw down a bar tack, too.  I liked it better, it's really easy and pretty.  You won't see it, but pretty is always pretty.  It also seemed to keep the pleats more in place.  I did the rest of the straps with both these methods for consistency's sake, praying it wasn't like the heinous act of using both seatbelts and LATCH.  Another pull and they seemed much sturdier and stabler. 

pleated straps pinned down

pleated straps with X boxes and bar tacking
Next I laid out my outer fabrics in sewing order.  Put the two outer fabrics right sides together and  then set the canvas on top.  I pinned them together to keep them from misbehaving while I sew the next step.  Tucked all the straps in...piled them up on top of the canvas so they aren't hanging in the way of the edge of the canvas.  Rolling up each strap and using rubber bands to secure it is a clever idea that I did not come up with.  
pin those layer together

pile the straps out of the way
Now I did a simple running stitch long the edge of the canvas, only catching the 2 outer fabrics and not catching the canvas or straps.  Or I could have used a pencil and traced the canvas exactly at the edge onto the top of these 2 pieces and I could have skipped the whole pinning and trying to sew carefully thing.  Hindsight is 20/20.  I made sure to leave a space at each strap location so I could feed them through later.  I took the canvas and straps out of the way--throw it on the floor, I mean really out of the way-- and turn the 2 outer pieces right side out.  Re-oriented my brain and stuffed the inner layer in between these layers like you are putting a pillow into a pillowcase.  Threaded the straps through their corresponding holes.   It's funny how the hardest things to describe by words, the things that would most benefit by having a picture to go along with, are often also the hardest things to get pictures of.

The next step is to tuck in the seam allowance where it is peeking out at the strap base and stitch them down.  This is non-weightbearing so I like to stitch by hand to get it really neat.  I think the stitch I use is called the ladder stitch.  I did this for all the strap holes.  It should be looking really good now.  The last thing is just to topstitch all the way around the edge, I use the presser foot as my guide, which will keep the inner layer from getting all twisted and impart strength to the carrier.  I went around a second time with the topstitching just to make it look a little nicer.  

topstitch using presser foot as spacing guide


I don't have a finished/action shot yet.  But I love the combination of comfort, ease, versatility!


Saturday, July 13, 2013

Itajime

A clamped resist experiment.

Sorry folks, I've given up on wasting my time formatting these entries.  Apparently the only way to achieve concinnity (I hope that's a real word and M-W isn't hoodwinking me, the red squiggle's hanging around) throughout posts is just to leave things in default, which unfortunately means Times New Roman--gag.  Well if you want pretty, skip to the pictures like everyone else.


In this project I wanted to end up with some cool hexagonal--or at the very least triangular-- repeat pattern over the whole of the fabric.   So I folded it in half lengthwise, then in half again lengthwise, then a la paper football, only instead of a right isosceles triangle I did equilateral triangles.  Then I smooshed the fabric all down between 2 vitamin water caps and clamped them with this crazy easy grip clamp thing I found in the garage.  Only apparently I could have smooshed it more if I'd used it the right way.  It didn't make much difference anyway.  I then dipped the fabric in some leftover green dye from a tie dye project a couple weeks ago, added soda ash, and left it for a while.  An hour?  I dunno.  When I rinsed it out, it turned out that the dye had really only highlighted the edges of the folds, and due to my thoughtless folding, the folds that were more in the center hardly got any dye.  The circles I was hoping would appear were nowhere to be seen.    End of round 1.

Round 2:  I basically folded it exactly the same except I tried to be conscious of which direction of folding would allow more raw folded edges to be accessible to the dye.  I had figured out how to get the clamp tighter and thought that was going to help.  I soaked in soda ash then dipped in a concentrated mixture of royal blue for another couple of hours.  I still wasn't satisfied--I wanted circles, by golly!  So before my dye exhausted I folded it up one more time for another round.

Round 3:  I folded this time just into squares because I was hungry and dinnertime and whining toddlers are hardly conducive to repeating the same time-consuming fold for the third time.  This time I let it just sit overnight, and when I rinsed in the morning, voila! there were my circles.  Of course that wasn't really the effect I was going for, but still totally cool. 


Round 1: clamped fabric football

Round 1: green dye soak

Round 1: results

Round 2: results
Round 3: square fold clamped

Final product


Friday, July 12, 2013

Ice Dye Experiments

In this facebook group I'm in we have seen a lot of ice dyeing since it's fun, easy, beginner friendly and ideal for summertime.  People have been wondering what effects temperature and therefore melt speed has on the pattern that emerges.  I had ice dyed in the summer last year and the pattern came out very much like watercolor and I also did some in the winter which came out crisper, which led me to believe that cooler melt temps would give colder looking patterns.  Boy was I wrong!  I also wanted to find out if ice size had any effect, so I crushed up some ice in our mortar/pestle.

I presoaked for an hour or so in soda ash solution, squeezed out excess water.  Crumpled onto draining trays set in drip-catching trays.  Covered in both regular and crushed ice.  Sprinkled dry dye powder on top, and set in their respective temperatures.  The one I set outside was inside a clear plastic box with lid in direct sunlight when the shade temps were around 100 F.  It melted almost completely in an hour.  The fridge temperature was apparently too cool for the ice to melt at a decent rate, and so after 4 hours, I brought it out into the house temperature, so maybe 80-85 or thereabouts, and it melted by 2 hours later.   A rinse and a soapy hot wash and hang to dry.


to melt outside
to melt in fridge


iced
iced


t=0
dyed, t=0


t=1 hour


t= 4 hours
t= 4 hours


rinse
L->R: itajime; fridge; outside; outside

The itajime is from another project and another post.  Maybe later.  Maybe if blogger's formatting didn't suck so much I would have had it done today too.


Paste Resist Experiments

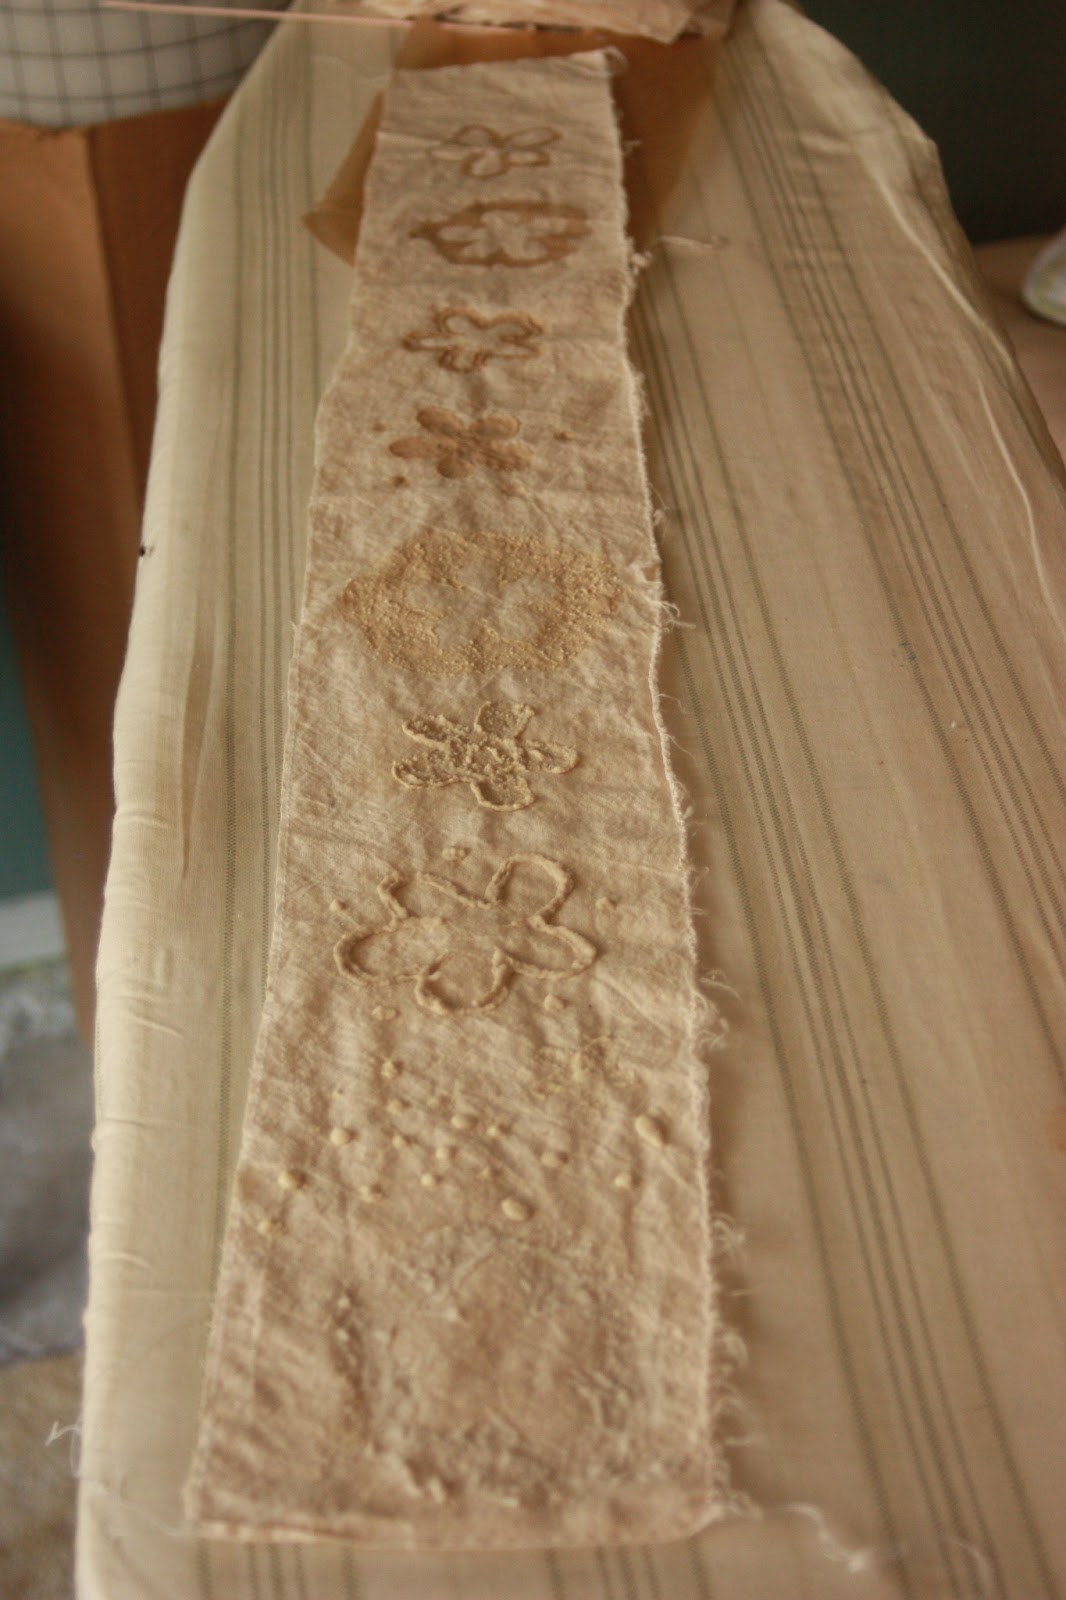
For this project, I tried out different combinations of different ingredients to see which makes the best paste.  I used rice ground into powder, quinoa ground into powder and diatomaceous earth mixed with water.  For reference I also did a bit of glue resist which I know works well.
materials

drying
dyed
 Left to right:
a. 1:1 rice: water
b. 1:1:2 rice:quinoa:water
c. 1:1:1.5 rice:diatomaceous earth:water
d. 1:1:1:2 rice:diatom.:quinoa: water
e. 1:1:2 quinoa:diatom.:water
f, g: 3:1  diatom.:water (these don't really show up at all)
h, i: Elmer's clear gel glue


Ok that's all I feel like writing about on this.  It's probably all I'll ever do with it, but sometimes you just gotta test your theories.


Friday, June 14, 2013

The Voyage of the Dawn Treader

Having done the shibori method which reveals little bubble-like rings on diapers, I had the idea that it would be cool to have a burbly line of them running down the center of a wrap.  Once I had thought of that, I was reminded of a peculiar phenomenon that happens when you're rowing an 8 and your boat is "set".  Even through the creaking of the seats, groaning of the oarlocks, and murmur of the coxswain, you can hear a line of bubbles passing right along the center of the hull.  It's magical.  The boat I most often rowed in was called Dawn Treader.  There was one time we were rowing along and I and my seatmate were just resting our oars on the water to provide balance during a drill.  I looked down into the water right as we were passing where Barton Creek pours out onto Town Lake, and true to its namesake the Dawn Treader was passing over the most amazing views, the colors were so spectacular it could have been a tropical ocean, rather than a toxic city lake.  What if I could recreate that feeling on a wrap?   I had to try.  


this is not a good example of "set", the weather sucks, and it's sloppy bladework, but this is my DT in a race
First I chopped, hemmed, washed the linen.  Then I took a spool of that synthetic twine (nylon? polyester? I'm not sure) ans tied in about a gazillion little tufts.  This is where some people tie around rocks or marbles, but I like tufts.  I wrapped the string around the neck of each tuft 2-4 times, and then secured it with a half hitch before moving on to the next tuft.  All the way down the fabric, with one long piece of string, theoretically so it is easier to untie at the end of the dye process.  Sometimes this works, sometimes it doesn't.  I recommend wrapping your fingers in band aids or tape as soon as you notice hot spots forming.

tied


After I had gotten all the tying done, I used clear Elmer's glue gel to add in small dots for smaller bubbles.  This took a lot of patience, and I highly recommend putting something under the fabric that will not get stuck to the glue.  I glued on top of my cutting mat. I got a little trigger-happy with the glue, and consequently hae more spots than really I actually want.  Then just wait for it all to dry. 

Once my dye arrived, I mixed up colors from scratch.  On one rail, I just used straight turquoise; on the other, turquoise mixed with lemon yellow; in the center it was turquoise mixed with royal blue.  And perhaps cobalt?  Yikes, this was just yesterday and already I can't remember.  Anyway.  I also mixed up the soda ash.  I stuffed the wrap into the bottom of a big plastic tub a la LWI, and poured on the dyes.  I then waited a few minutes and poured the soda ash on top.  Once I had done this, I squished it around to make sure the dye penetrated the folds, but tried to keep it from entering the places I had applied resists.  I tipped out the excess dye/soda ash mixture (tip out the short edge of the tub to keep the dyes from muddying).  I covered with the box's lid and set in the yard for the duration of nap and a bit.  

LWI

 Then I rinsed out in the washing machine on cool just to get some of the dye out and then I untied.  My hands got very blue.  Then I washed on hot, but the glue just didn't seem to be coming out in spots.  I set it to soak in a tub of cool water til morning, then hot wash again.  Still glue.  I took it in the yard and tried to pressure spray the glue off.  No go.  So far the best thing has been just to scratch the glue out with my fingernails.  I hope it doesn't get too pilly.  Then it will be up for another hot wash just to be sure.  

closeup of resists

mostly finished


Ori Nui Shibori


Two halves to my 6 yds of linen.  Each were to become watery, but in different ways.  

For one half, I used a shibori method called ori nui to create a resist in the fabric.  Different combinations of the basic running stitch yielded different results in the end.  The parallel line of stitching actually came out the faintest.  The single line of stitching was the one I made meander most, and it came out clearly, but not particularly exciting.  The most interesting pattern was the one where I folded the fabric and stitched a running stitch about 1/2 inch from the fold, then also stitched a running stitch on the fold.  
I gathered it all up as tight as I could, dropped it in a very concentrated dyebath of cobalt blue, and let it dye for a few hours, then washed and washed and washed until the water ran clear.  Pulled the stitches out, and voila!

parallel stitching on left, center line of folded stitch on right
all gathered up
about to hit the tub
 
dyed, washed, and stitches removed
folded with center line of stitches
single running stitch


Monday, May 27, 2013

Catchup on Things from a While Back: Sandals, Doll

Wow, it's been quite a while.  I got out of the habit of posting when I was Christmas elfing, then just had a long creative break.  Well here are a few thing I've done since.  I'm sure I've made tons of other things, and done a great deal of mending-type things, but they don't have photos, so I don't know. 

Back in March, I made a pair of summery sandals for F.  They're based off the same idea as the solid winter shoes I made him, in that they wrap around and snap at the ankle to keep them securely on.  I wanted his toes and heels to still be well covered, since the ground here is so unfriendly, but I made the sides of the shoes out of strips of leather in order to allow airflow, and also have cool colors.  The artificial sinew seems to be much sturdier than my previous stitching methods, and so far so good.  The only thing I'll improve is the width of the blue straps going through the tongue, they were a wee bit too narrow and seem to be stretching a bit there, which makes the snaps not quite tight.  The way the strap threads through the tongue means they're a slight bit harder to put on a running away toddler than the winter version.


A while back I saw a tutorial on thebabywearer for making a Waldorf style doll.  I like their simple facial features and calm endearing looks.  So back when I ordered my dye from Dharma, I also ordered their cotton knit fabric, wool felt, and the color "chamois".  I dyed up the jersey knit, and it looked perfect on my very first try.  Which is good because I shortsightedly dyed up the whole yard all at once.  The wool felt was actually meant for another project which was too much of a failure to even think about salvaging.  So I used it as the stuffing and the fabric for the base layer (in lieu of the tubular gauze the instructions called for.)  Then I also used it as the final skin layer.  For the hair, I purchased Paton's wool yarn from my local JA, and started trying the vinegar method for dyeing protein fibers with procion dyes.  I tested a bunch of different lengths and colors, with interesting results.  I ended up using the yarn that was solid natural colored (rather than white or mixed white/natural) to give the hair a more natural and less vibrant colored hair.  The dyes I used were bright yellow and deep orange, with maybe 3/4 or 5/6 of the dye being yellow and the rest orange.  It really turned out so much better than I expected or imagined it could.  Once I finished the body and facial features, I had to wait a while to get the hair materials.  I think F might have liked it just fine without hair, but the knots and tails for the face stuck out the back.  And the skin has to be folded like a wrapped present at the top of the head.  The hair took forever, and I broke some needles before I figured out a rhythm to the thing.  But it's thick as a carpet, and I decided to leave it loopy.  If I need to, maybe one day I'll trim it.  Anyway, without further ado, F's doll:

Well, I've got tons of projects rattling around in my head, so assuming I can keep up the momentum on photos and blurbs, I'll attempt to get back to posting.


Monday, November 5, 2012

Knitted Longies

Now that we've had a shift in weather towards cooler than sweltering, I'm thinking about our warm clothes wardrobe.  And we need some longies.  Woolen pants to wear over a diaper.  Once lanolized, they are not exactly waterproof, but water doesn't get through them, since one of the coolest things about wool is the amount of water it can hold before feeling wet.  And water is the least of our worries, right, folks?

Method:
For these I started out by casting on 108 stitches using the cable cast-on method.  This is pretty much where my technicality withers into a mishmash of knowing what I'm doing and guesswork, so if you were thinking you could follow this pattern mindlessly, you can think again.  If however you don't have any interest in knitting jargon, you can go ahead and skip to the pictures.  Then I made ribbing (K2P2) for some number of rows that felt right.  Then went back to regular knitting for a while, then decided to do a row of purling on the knit side, which is how I got that thin stripe.  Then maybe 3 rows of knitting, then I started the moss or seed stitch, which is just offset purls and knits so they make a tile pattern.  Then I kept on knitting for a bit until I felt the need for more thin stripes, and continued until the length of the piece I had seemed sufficiently long.  I based this length off our current (boughten) wool soaker.  I made a gusset as shown in this pattern.  It went okay, but probably not as well as it might have if I knew what the heck I was doing.  I might have already made the rise too tall, so I cut the gusset a bit shorter than I might have.  Probably not the wisest decision.  Then I began the legs by dividing the row in half, inserting a lifeline to hold the half I wasn't currently working on, transferring the half I was working on onto double pointed needles and working in the round down to the bottom cuff, which was more K2P2 ribbing.  I cast off, went back and did the other leg.  

Things I discovered while doing this project: 
While looking up how to do a stretchy cast on and seed stitch, I found out that there are two kinds of knitting: Continental style in which the yarn leading to the ball is held taut in your left hand, and English style, in which the yarn is held taut in your right hand.  Due to the mechanics of this and how you have to switch your yarn from front to back to change between knitting and purling, ribbing goes a lot faster if you are using the Continental method, though it is less forgiving of correct tension than English.  What I found out about myself was that in my prior ignorance, I had already been doing Continental purling, and English knitting, to balance the work between my hands for their relief.  It took a while but I taught myself how to knit from the Continental side so I could do this speedy ribbing (or seed stitch).  I still switch back to English knitting if I'm doing a whole row.  Now I'm getting the hang of the Continental, and really prefer it. 


The results:
 
Knit longies.
Now I've seen them on, I am super pleased with the way they came out, and the rise height and leg length are just right.  

A trial run.


Monday, October 29, 2012

Winter Hat


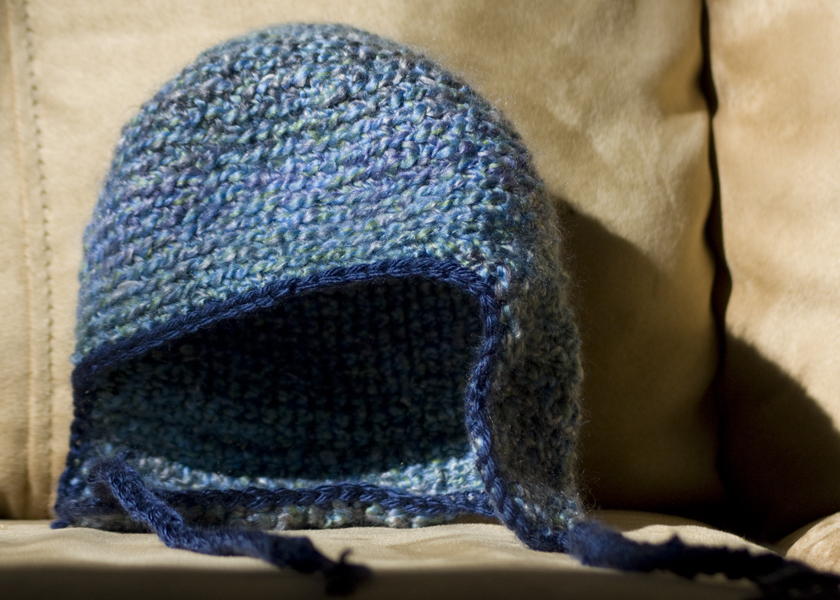
Crocheted a winter hat for the kiddo over the past couple of days.  Worked most of it in the round, crocheting into the back loop only, then back and forth to make the back a little longer and add earflaps.  Went around the rim with a dark blue yarn to smooth off the edges and create braided ties. 

Sunday, October 28, 2012

Baby Pants Alterations

An bit of a tutorial to help you alter store-bought pants to fit over cloth diapers:

You'll need: 
-baby pants.  make sure they are the length you need and have sufficient stretch in the waistband. 
-matching fabric (or not, as suits your fancy)
-scissors
-needle & thread or machine.  

Steps: 
1.   Cut down the back seam of the pants, from the crotch (is that the best word there is?) to the belt loop if there is one, or the yoke or a reasonable stopping point so long as it doesn't interfere with the waistband.  I cut on either side of the seam, removing it entirely so that I could have less bulk in my own seams.  Additionally, I cut about a half inch out of the top of the inseams. 

1.  Cut along seams at center back and inseam, like so.

2.  Carefully, put the pants on the kiddo in question.  Let him crawl and stretch and basically move in his usual way.  The biggest problem for us with these trim-looking baby pants is that over the cloth diaper they keep him from moving his legs smoothly while crawling, and they pull down the diaper.  Neither good.  So a main goal of mine for this project was smooth crawling.  Most of the area of the pants that needed expansion was in the rump, with just a bit in the crotch to make it wider. 

2, 3, 4.  Couldn't get a pic in use, but the gaping was a little like this.

3.  Look/measure/estimate at the amount of gaping that occurs while the kiddo is wearing the pants.  I got a general idea of the shape of the gape and measured it at its widest point using my finger.  If you can find your tape measure, feel free to do it the proper way.  I figured on a tiny bit of extra ease anyway, so didn't want to spend a lot of time measuring.
4.  Carefully take the pants back off again.  

5.  Cut out your second fabric to a bit larger than the hole including seam allowance.  
6.  Pin the fabric to the pants.  I found the easiest way for me was to tuck under the raw edges of the fabric, and pin it from the outside, so both right sides were showing on the outside, as if I were doing an applique.  I added a pleat going in either direction at the bottom, where the back panel joins the inseam, so that there could be sufficient expansion in that area as well. 

7.  Added fabric basted on.
7.  View of the pleat at the inseam.

7.   Sew the fabric to the pants.  I basted it on by hand for a trial run on the kiddo, with the intention of sewing it more securely by machine at a later point. 
8.  Press, if you're so inclined.  Finish seams if that makes you happy.  

This was incredibly quick as projects go, took me about an hour, and that was with me sewing by hand.  The results have been excellent--Chubber can crawl freely, and seems more comfortable wearing pants while being carried in the Ergo.  Pants that have back pockets may look a little silly, since the pockets get pushed off to the sides. 
Hope this helps someone out there in a similar pickle!